This topic provides an overview of using the Squonk Data Manager.
Logging in
Access the Squonk Data Manager at https://squonk.informaticsmatters.org/data-manager-ui.
You need to be logged in to do any meaningful operations. To do this click the Account button in the top right corner and choose Login.
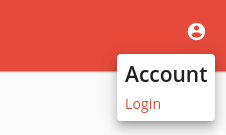
This will take you to our Keycloak Single Sign On system where you enter your username and password and then get taken back to to the Squonk Data Manager.
Currently we need to create an account for you. Email info@informaticsmatters.com to request an account, along with a brief description of what you are wanting to do.
Projects, Units and Organisations
The Squonk Data Manager has the concept of an Organisation (e.g. your company or university) and within that Organisation you have Units (e.g. a research group or department). Projects belong to a Unit. This allows to isolate your work and restrict access to it to specific users. Projects can be shared with users outside your organisation if you wish. The Unit is responsible for the usage of all its projects and will (at some stage) need to pay for that usage.
Evaluation Projects are always public and visible to all users, but are free to use. Projects in other tiers can be made private and restricted to specific users. See below for more info.
There is a Default Organisation which all users can belong to, and within that Default Organisation you will be given your own Personal unit where you can create Projects.
First time bootstrapping
When you first log in you will likely be taken through the bootstrapping process. This allows to create your own Personal Unit in the Default Organisation and a project in that Unit for you to work in. The name of the Personal Unit is your username.
Once you have been through the bootstrapping process you can create additional projects in the Settings window as described below.
Datasets tab
Datasets are files that you can work with. You don’t need to use datasets to do some work in Squonk Data Manager, but using them has the following benefits:
- Datasets can be shared with other users.
- Datasets can be versioned.
- Metadata is indexed e.g. descriptions and data types of the fields in a SD-file.
- Datasets with molecules (e.g. SD-files) are indexed with the RDKit cartridge, which in future will allow structure searches to be performed to identify the use of molecules, or similar molecule sin other Datasets.
- Other useful operations on datasets will follow.
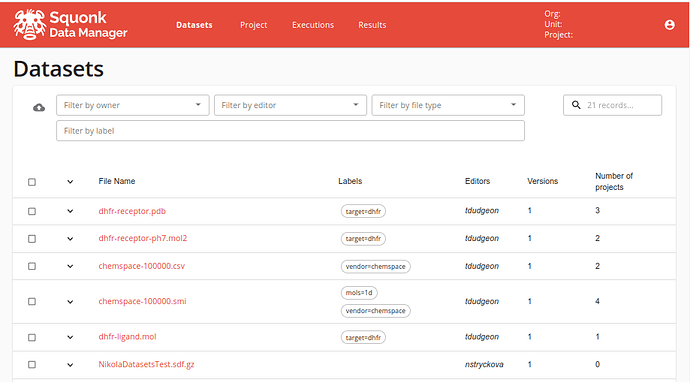
Datasets visible to you are displayed on the Datasets tab.
Those displayed can be adjusted using the filter settings at the top of the page. Important here is the ability to filter by the labels that have been associated with the datasets.
The different versions of a dataset can be seen by expanding the dataset row using the down arrow icon on the left. If you click on the dataset name or the name of one of its versions you get taken to the details page for that dataset where you can perform a number of operations:
- Make other users Editors of the dataset
- Switch between the different versions
- Upload a new version
- Add or modify the labels
- View the dataset as text or in the browser
- Attach a specific version to a project as a file
- Delete a version
On the main dataset page you can create a new dataset by uploading a file (or files) using the Upload button: ![]()
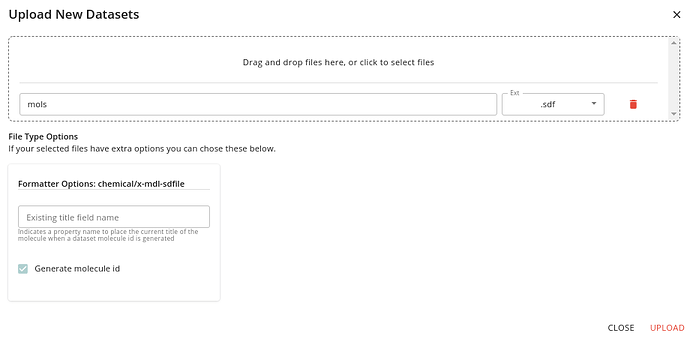
This takes you to the Dataset upload page:
On this page you can select files for uploading using drag-and-drop. For files that will be indexed (e.g. SD-files) you can specify some options for how the indexing is done. [TODO - describe this in more detail].
User settings window
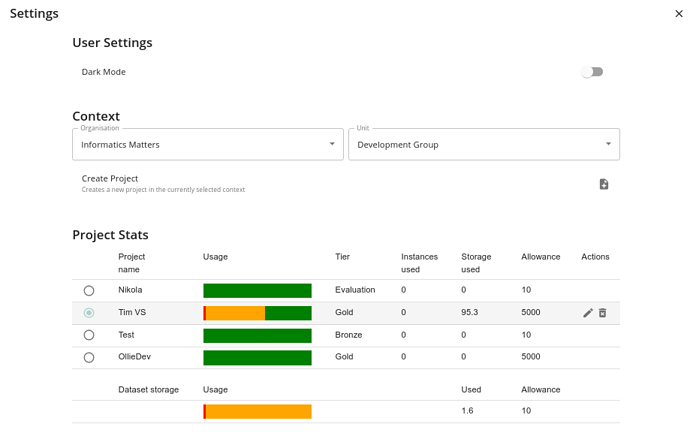
Before we can move on to Projects we need to explain how to select a project to work in. You do this by clicking in the Settings icon which is displayed in the top right corner. You will see a page like this:
The key elements here are the Context in which you are working. This is composed of an Organisation e.g. your company and a Unit within that organisation e.g. Anti-virals. Projects are associated with a unit. The unit is responsible for the usage of its projects e.g. paying any costs.
Individual users are associated with the Default organisation and have a unit created for them which corresponds to your username. In this case the individual user is responsible for the usage of their projects.
Select the appropriate organisation and _unit from the drop downs and you will see any projects that are associated with your selected unit. Use the radio button to the left of the project to select the current project that is being used.
In the details for the project you will see the usage in that project (only if you are a member of the unit) . This includes the storage used, the predicted storage use at the end of the monthly period based on current usage and the costs associated with running jobs or applications. The allowance is dependent on the the project’s tier. Currently we have these tiers:
- Evaluation - limited quota and all data is public
- Bronze - limited quota and project can be made private
- Silver - like bronze but with more quota
- Gold - like silver but with more quota
To create a new project click on the Create Project button and specify the name and tier.
Your selection of organisation, unit and project is shown in the main window title bar.

If you are an owner of the Organisation you can also create new units in it.
Projects tab
Projects are where you mostly do your work in the Squonk Data Manager. A project is an area of disk space where you can create files, run jobs, launch applications etc. That bit of disk space (and hence all the files in your project) is accessible when you run a job or an application like a Jupyter Notebook. This way you can run a series of jobs or notebooks to achieve a series of tasks.
Projects can be public or private (Evaluation tier projects are always public) and you can specify which other users can be editors of the project. These editors have the same privileges in the project as you do as the owner, allowing you to collaborate with other users, but you, as the owner are responsible for the usage (and hence costs) in that project.
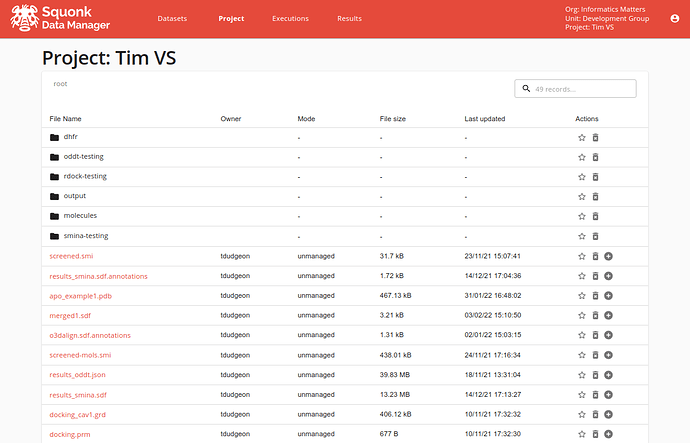
Once you have selected a project the Project tab will display the list of files and directories in your project and let you perform basic operations on these.
Files are one of two types:
- Unmanaged files - those that were created or uploaded to a project of which the Data Manager has little knowledge about (they are not datasets)
- Those that have a corresponding dataset that contains additional metadata and might also be indexed. These are created either by attaching a dataset to the project, or by converting an unmanaged one into a managed one, creating the corresponding dataset.
Within a project both types are just plain files and you typically work on those files using applications and jobs launched from the Executions tab.
Executions tab
To work on the data in your project you use applications and jobs that are launched from the Executions tab. When launched these applications or jobs have full access to your projects data.
Jupyter Notebook application
Currently there is one application, a Jupyter Notebook. When running this you specify a name for the notebook instance and some parameters about what type of notebook you want.
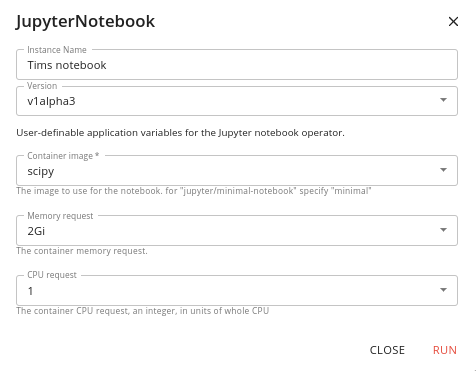
A Jupyter Lab instance is launched in a container that has access to the project’s data.
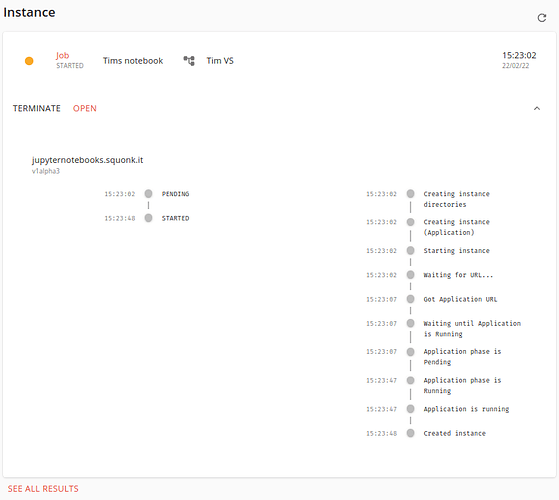
The instance is shown at the bottom of the JupyerNotebook card. Click on it and you will be taken to the Results tab where you can see the details of the instance.
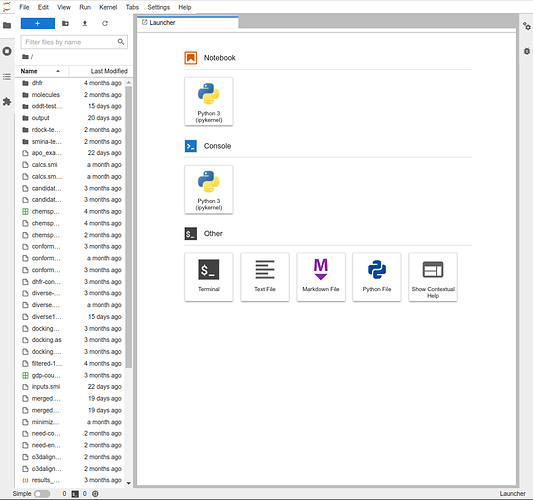
Once it is ready (usually after just a few seconds) you can click the OPEN link to open the Jupyter Lab interface in a new browser tab.
From there you can work with files in the file manager on the left hand side, or launch a Jupyter Notebook or a terminal session from the main section. The file manager can be useful for uploading new files to your project. A terminal session can be useful for doing other operations on your data.
The currently available notebook images are the basic ones from the Jupyter hub project. These are based on the conda package manager and you can install additional packages using conda install ... in a terminal window, or from a Jupyter notebook.
When you are finished with the notebook remember to do back to the Results tab in the Data Manager and click the TERMINATE link to shut down the notebook so that you are no longer consuming usage against your project’s quota.
Jobs
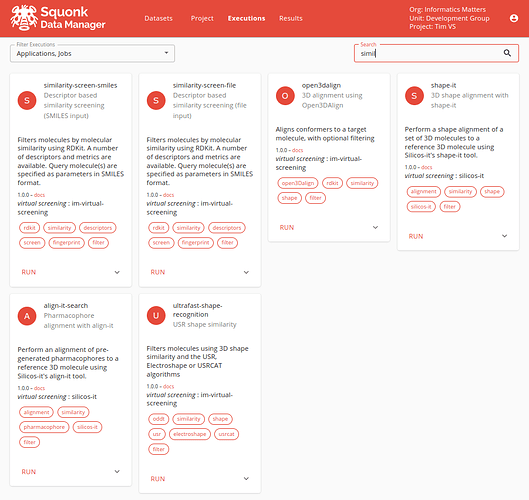
A wide range of jobs is available from the Executions tab. You can filter those that are displayed using the Search box.
Each card shows the job ID, name and a brief description. Also displayed is a link to the documentation for the job, the collection it comes from and the tags that are defined for it that are used when searching.
To run a job click on the RUN link. A Window will pop up where you can specify the inputs (files from your project) and options you want to use and then click RUN to launch the job.
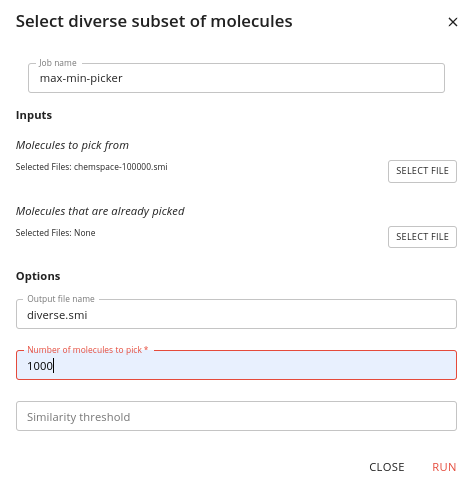
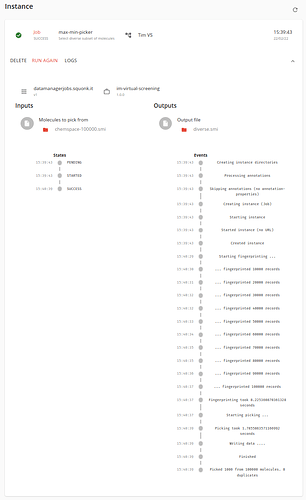
A summary of the running job instance is displayed at the bottom of the card. Click on it to be taken to the Results page where you will see details of its execution, and be able to link to the results once complete.
If the job fails for some reason you might want to look at the logs using the LOGS link to see what went wrong.
Finally, once you are happy with the execution of the job you can clean up by clicking on the DELETE link. This cleans up any intermediate files and log files, but does not delete the result files. You must delete those manually if you no longer need them.
Execution security
When jobs or applications run they run as containers in a Kubernetes cluster. The user ID they run as is your user ID (each Data Manager user is assigned a user ID that is the Linux user ID that the container runs as. The containers run as the group ID that is assigned to the project. Each project is assigned a different group ID.
This provides strong security control using standard POSIX mechanisms and means that files in your project that are created by jobs and applications have ownership and permissions that only allow people who are members of your project to access.
